Best Acrylic Painting Techniques for Beginners - How to Paint, Brushes, Mediums, Thinning Acrylics, Pro Tips
EVERYTHING YOU NEED TO KNOW TO LEARN TO PAINT LIKE A PRO!
Acrylic painting techniques made easy – Step-by-step – Beginners acrylic painting

READY, SET, GO…WAIT! WHAT DO I DO?
For us creatives shopping for paints and supplies is like a kid in a candy store—all the colors, mediums, tools, options…opportunities! Let’s start buying and loading up our cart. I can’t wait to try it all!
Hold on, grasshopper.
It can get expensive (and fast) if you don’t really know what you’re doing and let yourself get carried away by all the options either in the aisles of the art store or online.
And what’s more…you don’t even need lot of it to get started creating gorgeous artwork.
I was there (and this was before blogs and Youtube), so it was very trial and error situation.
I did a lot of trials.
I made a lot of errors.
And I lived to tell the tale. Somehow I navigated my way to creating art that people will spend their hard-earned money to buy.
Let me help you a little. This post means to help you navigate what to purchase and invest in for your studio and toolkit before you go shopping. You can choose one or two techniques for the type of art you wish to create and know what it does before purchasing the entire store.
Acrylic painting techniques for beginners —
Your personal cram course for getting the acrylics to perform.on.demand!
Read through this, watch a few of my videos (here are even more), join my CREATIVE TIPS GROUP (newsletter and FB group) and then I’ll send you a certificate on completion for being an ACRYLIC PAINTING MASTER!
No, not really.
But you will learn something and hopefully take it to your own little creative corner of the world and apply it with a newfound confidence!
We will cover:
- Acrylic Paint - why it''s the #1 choice for so many artists
- Basic painting techniques you can master
- Brushes for acrylic painting - my favorites and what they do
- Other tools you can use with acrylics
- Mediums - basics and water - which acrylic painting mediums you should invest i
Awesome Acrylic Painting Techniques for Beginners
Why do I love acrylics?
Oh, let me count the ways:
1. Acrylics are super easy to manipulate. Depending upon the type of tool or medium you use, they can give you a variety of effects – Thick impastos, watercolor-like and washy, brushstrokes or smooth, splatters or controlled…the list goes on!
2. They are inexpensive. Sure, you can get top-of-the-line paints (and should have a few in your arsenal as you progress), but you can start with a nice “student” or basic set and get a myriad of colors, tones, hues. Even though I have numerous paints, I invested in this kit and it’s one I use often and recommend: BASICS by Liquitex Acrylic Paint Set
3. You can use so many tools with them-I often use non-traditional tools to get interesting effects
4. Easy to clean – acrylics are water-based (unlike oils with of course, are oil-based) and they can be easily cleaned with water and little soap, like this one that is made to get the paint out of your brushes easily
5. They dry quickly – This can be a double-edged sword as acrylics that dry quickly can prevent you from getting good blending or moving colors (like with oils), however, they dry quickly and can give you layers to work with allowing you to create beautiful transparencies (like watercolors) or a finished artwork within a short period of time.
6. They have numerous mediums available that they can be paired with to create outstanding effects. Mediums are another post (and topic) altogether. We’ll cover a few of the basics here, but it will only touch on the most popular.
7. Popularity of acrylics means there are a growing number of types: Soft body, heavy body, fluid, hi-glow, pourable…the list keeps growing as paint manufacturers continue to pay attention to their increased demand for more options.
ACRYLIC PAINTING TECHNIQUES TO GET YOU STARTED
Washes
One of my personal favorites for creating softer abstracts (which I often create) is to use a little more water and a medium to get a watercolor effect with my acrylics.
Using water (a little) with a medium gives beautiful transparencies and can allow you to layer color for a see-through effect.
Unlike watercolor, the acrylic layers will set permanently so no worry of water spots of accidental drips on your painting once the paint has fully cured.

Pointillism/Stippling
The masterpiece (in the park?) by Georges Seurat is a famous example on a large scale. You can do this on your artwork by using a tiny brush (the more pointed and stiff, the better) and by creating a mass of tiny dots to create a shape or texture.
Drybrushing
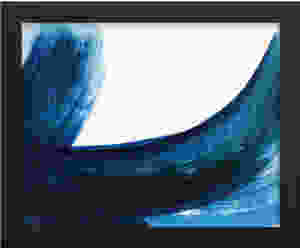
Plop some paint on your canvas and use a brush without any medium or water and you have a “drybrush” technique. This will result in creating an intense color on your canvas. This technique can give you bold strokes for eye-popping abstracts.
BOLD STROKES - drybrush painting - intense color on paper

Splatter Painting
Bring out your inner Pollack with the free-form abstract splatters. No need for various tools; just a brush, canvas and paint will get the job done.
By using a wet mix of color (acrylics and water and/or medium), you can flick or splatter paint onto a canvas in layers of colors and intensities. While it can be used as an all-over painting technique, you can also use carefully positioned splatters for interesting effects on just certain areas of your painting.
Sponge or Rag Painting
Using a sponge or rag (or even just a piece of paper towel dipped in paint), you can develop a unique technique surface with acrylics. I often will use a sponge to cover large areas on my bigger canvases and then use brushes and other tool to develop color on top.
You can use a sponge the other way around, too. By painting your canvas, you can apply unique paint layers on top with a sponge or fabric/rags.
Dabbing color onto your canvas can be easily accomplished with the corner or a sponge or rag. Sometimes it’s the best tool and can only do what no other can for you.
Palette Knife
Oh, the lovely palette knife! I adore working with it and so do many other artists. You can get effects no brush can give you and lay on paint in some serious impasto mode!
I love a knife to apply my texture mediums prior to paint.
It’s easy and I often liken it to frosting cupcakes since it’s essentially the same technique. Beginner friendly!
Although it’s not as easy to really control painting with a palette knife, it’s deceptively complex to get the right look if you are working on realism or need controlled lines. This takes practice, but it’s really a fun way to paint.
Add heavy gel or modeling paste mediums to your paint and then working with a palette knife can help you build amazing textures and impastos on your artwork.
You can cover a full canvas with washes of color and then apply a significant (or even just touches) of impasto with a palette knife to get an instantly eye-catching artwork.
Working with a palette knife and acrylic paints to create a soft abstract landscape.
HOW TO BUILD YOUR PAINTING FROM THE GROUND UP
One difference between a master/accomplished artist and a beginner?
Layers.
Quite simply, beginner artists (I was one, too) will try to apply all their paint to get a finished artwork fast.
The skilled and experience artist will work in layers, creating a ground and then “building” their artwork.
The fastest and easiest way to create more sophisticated artworks is to understand the value of layering and building, not only colors, but techniques.
BUILDING A BACKGROUND
Developing these skills and the patience required to do them properly, is what will take your work from amateur to professional. Even you never plan to sell or offer your artwork to the world, it will take on a new level of interest and will something you can be proud of.
PROFESSIONAL LEVEL TECHNIQUES FOR ACRYLIC PAINTING
PROFESSIONAL LEVEL TECHNIQUES FOR ACRYLIC PAINTING
UNDERPAINTING
You will often hear pro artists talking about the “underpainting.”
This can be easily done by the beginner by starting your painting with a sketch so you can understand perspective before you lay down your paint.
By this I mean, let’s say you choose to do a landscape.
First, where is your horizon line? Will it be straight across the middle of the canvas or ¾ of the way down?
Will you create a simple straight horizon or one with hills and valleys?
Will you choose to include clouds or light in the sky?
Where will that be and how large will that scale?
As you can see, once you start to ask yourself these questions you can understand the value of an underpainting and laying the framework so everything looks like it does in your mind (or as close as possible).
I use these – watercolor pencils - I find they work really well
I have a set of watercolor pencils that I use to sketch my basic idea onto the canvas. I like these because being watercolor, they will wash away if necessary and are easy to paint over. I will often use a coordinating color to what I’ll be using in my palette. For example, if I know I’ll be using greens, I’ll use a green watercolor pencil that will wash away or blend perfectly.
Lots of more to read...visit my art techniques blog


Comments
Post a Comment